关于WebVR
最近VR的发展十分吸引人们的眼球,很多同学应该也心痒痒的想体验VR设备,然而现在的专业硬件价格还比较高,入手一个估计就要吃土了。但是,对于我们前端开发者来说,我们不仅可以简单地在手机上进行视觉上的VR体验,还可以立马上手进行Web端VR应用的开发!
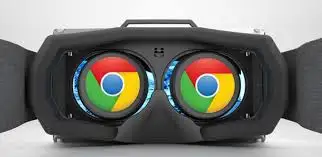
WebVR是一个实验性的Javascript API,允许HMD(head-mounted displays)连接到web apps,同时能够接受这些设备的位置和动作信息。这让使用Javascript开发VR应用成为可能(当然已经有很多接口API让Javascript作为开发语言了,不过这并不影响我们为WebVR感到兴奋)。而让我们能够立马进行预览与体验,移动设备上的chrome已经支持了WebVR并使手机作为一个简易的HMD。手机可以把屏幕分成左右眼视觉并应用手机中的加速度计、陀螺仪等感应器,你需要做的或许就只是买一个cardboard。不说了,我去下单了!
cardborad纸盒,一顿食堂饭钱即可入手
前言
WebVR仍处于w3c的草案阶段,所以开发和体验都需要polyfill。
这篇解析基于 webvr-boilerplate,这个示例的作者,任职google的Boris Smus 同时也编写了 webvr-polyfill 。 three.jsexamples中也提供了关于VR的控制例子。这里主要通过对代码注释的方式来解读关键的文件。
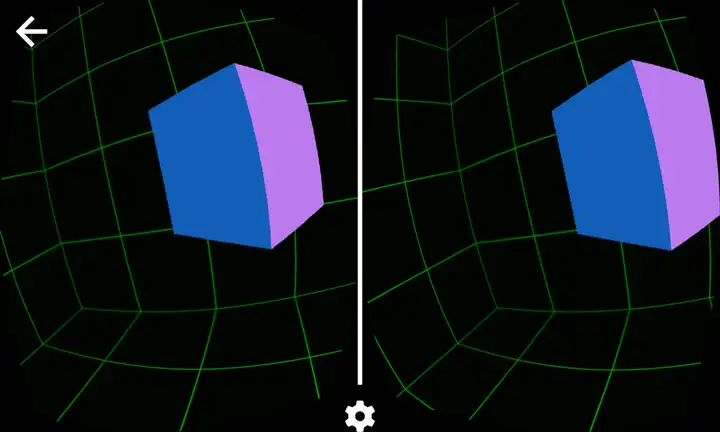
示例的最终效果如下,打开 http://soaanyip.github.io/webvr-boilerplate-cn/ 并把手机放进cardboard即可体验。你也可以在我的github https://github.com/SoAanyip/WebVR-Boilerplate-CN/ 对照有关的代码和注释
按照惯例,这篇解析默认你至少有three.js相关的基础知识。有兴趣也可以浏览一下我之前写的 ThreeJS 轻松实现主视觉太阳系漫游 。
这篇解析中three.js的版本为V76。文中如有各种错误请指出!
先从html开始
在示例中只用到了一个index.html。首先meta标签有几个值得注意的:
<meta name=“viewport” content=“width=device-width, user-scalable=no, minimum-scale=1.0, maximum-scale=1.0, shrink-to-fit=no”>
<meta name=“mobile-web-app-capable” content=“yes”>
<meta name=“apple-mobile-web-app-capable” content=“yes” />
<meta name=“apple-mobile-web-app-status-bar-style” content=“black-translucent” />
这几个标签对web app开发的同学来说应该是十分熟悉了。其中 shrink-to-fit=no 是Safari的特性,禁止页面通过缩放去适应适口。
接下来在js引用的部分,引用了这几个资源:
<script src=”node_modules/es6-promise/dist/es6-promise.js”></script>
是作者引入的一个promise polyfill;
<script src=”node_modules/three/three.js”></script>
three.js核心库
<script src=”node_modules/three/examples/js/controls/VRControls.js”></script>
从连接的VR设备中获得位置信息并应用在camera对象上,将在下文展开;
<script src=”node_modules/three/examples/js/effects/VREffect.js”></script>
处理立体视觉和绘制相关,将在下文展开;
<script src=“node_modules/webvr-polyfill/build/webvr-polyfill.js”></script>
WebVR polyfill,下文简述调用的API option;
<script src=”build/webvr-manager.js”></script>
界面按钮以及进入/退出VR模式的控制等。
具体的整个项目文件,可以在 这里
查看有关的代码和注释。
VRControls.js – HMD状态感应
这个文件主要对HMD的状态信息进行获取并应用到camera上。例如在手机上显示的时候,手机的旋转倾斜等就会直接作用到camera上。
第一步是获取连接的VR设备,这一步是基本通过WebVR的API进行的:
//获取VR设备(作为信息输入源。如有多个则只取第一个)function gotVRDevices( devices ) {
for ( var i = 0; i < devices.length; i ++ ) {
if ( ( VRDisplay in window && devices[ i ] instanceof VRDisplay ) || ( PositionSensorVRDevice in window && devices[ i ] instanceof PositionSensorVRDevice ) ) {
vrInput = devices[ i ];
break; // We keep the first we encounter
}
}
if ( !vrInput ) {
if ( onError ) onError( VR input not available. );
}
}
//调用WebVR API获取VR设备
if ( navigator.getVRDisplays ) {
navigator.getVRDisplays().then( gotVRDevices );
} else if ( navigator.getVRDevices ) {
// Deprecated API.
navigator.getVRDevices().then( gotVRDevices );
}
然后是三个关于位置的参数:
// the Rift SDK returns the position in meters
// this scale factor allows the user to define how meters// are converted to scene units.
//Rift SDK返回的位置信息是以米作为单位的。这里可以定义以几倍的缩放比例转换为three.js中的长度。this.scale = 1;
// If true will use “standing space” coordinate system where y=0 is the
// floor and x=0, z=0 is the center of the room.//表示使用者是否站立姿态。当为false时camra会在y=0的位置,而为true时会结合下面的模拟身高来决定camera的y值。//在无法获取用户姿势信息的设备上,需要在调用时直接指定是站姿还是坐姿。
this.standing = false;
// Distance from the users eyes to the floor in meters. Used when// standing=true but the VRDisplay doesnt provide stageParameters.
//当为站立姿态时,用户的眼睛(camera)的高度(跟如有硬件时返回的单位一致,为米)。这里会受scale的影响。如scale为2时,实际camera的高度就是3.2。this.userHeight = 1.6;
通过WebVR API获取到用户的设备信息,并应用到camera上,是一个持续进行的过程。因此这部分的信息更新会在requestAnimationFrame中不断地调用。
//将在requestAnimationFrame中应用更新this.update = function () {
if ( vrInput ) {
if ( vrInput.getPose ) {
//方法返回传感器在某一时刻的信息(object)。例如包括时间戳、位置(x,y,z)、线速度、线加速度、角速度、角加速度、方向信息。 var pose = vrInput.getPose();
//orientation 方向
if ( pose.orientation !== null ) {
//quaternion 四元数
//把设备的方向复制给camera
object.quaternion.fromArray( pose.orientation );
}
//位置信息
if ( pose.position !== null ) {
//同样把设备的位置复制给camera
object.position.fromArray( pose.position );
} else {
object.position.set( 0, 0, 0 );
}
} else {
// Deprecated API.
var state = vrInput.getState();
if ( state.orientation !== null ) {
object.quaternion.copy( state.orientation );
}
if ( state.position !== null ) {
object.position.copy( state.position );
} else {
object.position.set( 0, 0, 0 );
}
}
//TODO 此块会一直执行
if ( this.standing ) {
//如果硬件返回场景信息,则应用硬件返回的数据来进行站姿转换 if ( vrInput.stageParameters ) {
object.updateMatrix();
//sittingToStandingTransform返回一个Matrix4,表示从坐姿到站姿的变换。 standingMatrix.fromArray(vrInput.stageParameters.sittingToStandingTransform);
//应用变换到camera。
object.applyMatrix( standingMatrix );
} else {
//如果vrInput不提供y高度信息的话使用userHeight作为高度
object.position.setY( object.position.y + this.userHeight );
}
}
//使用上面定义的this.scale来缩放camera的位置。
object.position.multiplyScalar( scope.scale );
}
};
以上是vrcontrols的关键代码。
VREffect.js – 立体视觉
VREffect.js主要把屏幕显示切割为左右眼所视的屏幕,两个屏幕所显示的内容具有一定的差异,使得人的双目立体视觉可以把屏幕中的内容看得立体化。这个文件主要的流程如下图:
首先是对画布大小进行了设定。其中renderer.setPixelRatio( 1 ); 是防止在retina等屏幕上出现图像变形等显示问题。
//初始化或者resize的时候进行。
this.setSize = function ( width, height ) {
rendererSize = { width: width, height: height };
//是否VR模式中 if ( isPresenting ) {
//getEyeParameters包含了渲染某个眼睛所视的屏幕的信息,例如offset,FOV等
var eyeParamsL = vrHMD.getEyeParameters( left );
//设备像素比
//若设备像素比不为1时会出现显示问题。
//https://github.com/mrdoob/three.js/pull/6248
renderer.setPixelRatio( 1 );
if ( isDeprecatedAPI ) {
renderer.setSize( eyeParamsL.renderRect.width * 2, eyeParamsL.renderRect.height, false );
} else {
renderer.setSize( eyeParamsL.renderWidth * 2, eyeParamsL.renderHeight, false );
}
} else {
renderer.setPixelRatio( rendererPixelRatio );
renderer.setSize( width, height );
}
};
然后是关于全屏模式的设置,这里跟上面的设定差不远:
//显示设备进入全屏显示模式
function onFullscreenChange () {
var wasPresenting = isPresenting;
isPresenting = vrHMD !== undefined && ( vrHMD.isPresenting || ( isDeprecatedAPI && document[ fullscreenElement ] instanceof window.HTMLElement ) );
if ( wasPresenting === isPresenting ) {
return;
}
//如果此次事件是进入VR模式
if ( isPresenting ) {
rendererPixelRatio = renderer.getPixelRatio();
rendererSize = renderer.getSize();
//getEyeParameters包含了渲染某个眼睛所视的屏幕的信息,例如offset,FOV等 var eyeParamsL = vrHMD.getEyeParameters( left );
var eyeWidth, eyeHeight;
if ( isDeprecatedAPI ) {
eyeWidth = eyeParamsL.renderRect.width;
eyeHeight = eyeParamsL.renderRect.height;
} else {
eyeWidth = eyeParamsL.renderWidth;
eyeHeight = eyeParamsL.renderHeight;
}
renderer.setPixelRatio( 1 );
renderer.setSize( eyeWidth * 2, eyeHeight, false );
} else {
renderer.setPixelRatio( rendererPixelRatio );
renderer.setSize( rendererSize.width, rendererSize.height );
}
}
接下来是对表示左右眼的camera的设定。两个camera也肯定是PerspectiveCamera:
var cameraL = new THREE.PerspectiveCamera();
//左camera显示layer 1层(即当某个元素只出现在layer 1时,只有cameraL可见。)
cameraL.layers.enable( 1 );
var cameraR = new THREE.PerspectiveCamera();
cameraR.layers.enable( 2 );
从WebVR API中获取关于某个眼睛所视的屏幕的信息:
//getEyeParameters包含了渲染某个眼睛所视的屏幕的信息,例如offset,FOV等var eyeParamsL = vrHMD.getEyeParameters( left );
var eyeParamsR = vrHMD.getEyeParameters( right );
if ( ! isDeprecatedAPI ) {
// represents the offset from the center point between the users eyes to the center of the eye, measured in meters. //瞳距的偏移
eyeTranslationL.fromArray( eyeParamsL.offset );
eyeTranslationR.fromArray( eyeParamsR.offset );
//represents a field of view defined by 4 different degree values describing the view from a center point. //获得左右眼的FOV
eyeFOVL = eyeParamsL.fieldOfView;
eyeFOVR = eyeParamsR.fieldOfView;
} else {
eyeTranslationL.copy( eyeParamsL.eyeTranslation );
eyeTranslationR.copy( eyeParamsR.eyeTranslation );
eyeFOVL = eyeParamsL.recommendedFieldOfView;
eyeFOVR = eyeParamsR.recommendedFieldOfView;
}
if ( Array.isArray( scene ) ) {
console.warn( THREE.VREffect.render() no longer supports arrays. Use object.layers instead. );
scene = scene[ 0 ];
}
由于左右camera的视锥体还没确定,需要对获得的FOV信息进行计算来确定。在涉及透视投影矩阵的部分会比较复杂,所以这里不展开来说。如果有错误请指出:
cameraL.projectionMatrix = fovToProjection( eyeFOVL, true, camera.near, camera.far );
cameraR.projectionMatrix = fovToProjection( eyeFOVR, true, camera.near, camera.far );
//角度弧度的转换,然后进行后续的计算
function fovToProjection( fov, rightHanded, zNear, zFar ) {
//角度转换为弧度 如30度转为1/6 PI
var DEG2RAD = Math.PI / 180.0;
var fovPort = {
upTan: Math.tan( fov.upDegrees * DEG2RAD ),
downTan: Math.tan( fov.downDegrees * DEG2RAD ),
leftTan: Math.tan( fov.leftDegrees * DEG2RAD ),
rightTan: Math.tan( fov.rightDegrees * DEG2RAD )
};
return fovPortToProjection( fovPort, rightHanded, zNear, zFar );
}
//根据从设备获得的FOV以及相机设定的near、far来生成透视投影矩阵
function fovPortToProjection( fov, rightHanded, zNear, zFar ) {
//使用右手坐标
rightHanded = rightHanded === undefined ? true : rightHanded;
zNear = zNear === undefined ? 0.01 : zNear;
zFar = zFar === undefined ? 10000.0 : zFar;
var handednessScale = rightHanded ? – 1.0 : 1.0;
// start with an identity matrix
var mobj = new THREE.Matrix4();
var m = mobj.elements;
// and with scale/offset info for normalized device coords var scaleAndOffset = fovToNDCScaleOffset( fov );
//建立透视投影矩阵
// X result, map clip edges to [-w,+w] m[ 0 * 4 + 0 ] = scaleAndOffset.scale[ 0 ];
m[ 0 * 4 + 1 ] = 0.0;
m[ 0 * 4 + 2 ] = scaleAndOffset.offset[ 0 ] * handednessScale;
m[ 0 * 4 + 3 ] = 0.0;
// Y result, map clip edges to [-w,+w]
// Y offset is negated because this proj matrix transforms from world coords with Y=up, // but the NDC scaling has Y=down (thanks D3D?) //NDC(归一化设备坐标系)是左手坐标系
m[ 1 * 4 + 0 ] = 0.0;
m[ 1 * 4 + 1 ] = scaleAndOffset.scale[ 1 ];
m[ 1 * 4 + 2 ] = – scaleAndOffset.offset[ 1 ] * handednessScale;
m[ 1 * 4 + 3 ] = 0.0;
// Z result (up to the app)
m[ 2 * 4 + 0 ] = 0.0;
m[ 2 * 4 + 1 ] = 0.0;
m[ 2 * 4 + 2 ] = zFar / ( zNear – zFar ) * – handednessScale;
m[ 2 * 4 + 3 ] = ( zFar * zNear ) / ( zNear – zFar );
// W result (= Z in)
m[ 3 * 4 + 0 ] = 0.0;
m[ 3 * 4 + 1 ] = 0.0;
m[ 3 * 4 + 2 ] = handednessScale;
m[ 3 * 4 + 3 ] = 0.0;
//转置矩阵,因为mobj.elements是column-major的
mobj.transpose();
return mobj;
}
//计算线性插值信息
function fovToNDCScaleOffset( fov ) {
var pxscale = 2.0 / ( fov.leftTan + fov.rightTan );
var pxoffset = ( fov.leftTan – fov.rightTan ) * pxscale * 0.5;
var pyscale = 2.0 / ( fov.upTan + fov.downTan );
var pyoffset = ( fov.upTan – fov.downTan ) * pyscale * 0.5;
return { scale: [ pxscale, pyscale ], offset: [ pxoffset, pyoffset ] };
}
之后是确定左右camera的位置和方向。由于左右眼(左右camera)肯定是在头部(主camera,位置和方向由HMD返回的信息确定)上的,在我们获得把眼睛从头部飞出去的超能力之前,左右camera的位置和方向都是根据主camera来设定的。
//使主camera的位移、旋转、缩放变换分解,作用到左camra 右camera上。
camera.matrixWorld.decompose( cameraL.position, cameraL.quaternion, cameraL.scale );
camera.matrixWorld.decompose( cameraR.position, cameraR.quaternion, cameraR.scale );
var scale = this.scale;
//左右眼camera根据瞳距进行位移。
cameraL.translateOnAxis( eyeTranslationL, scale );
cameraR.translateOnAxis( eyeTranslationR, scale );
最后便是对两个区域进行渲染。
// 渲染左眼视觉
renderer.setViewport( renderRectL.x, renderRectL.y, renderRectL.width, renderRectL.height );
renderer.setScissor( renderRectL.x, renderRectL.y, renderRectL.width, renderRectL.height );
renderer.render( scene, cameraL );
// 渲染右眼视觉
renderer.setViewport( renderRectR.x, renderRectR.y, renderRectR.width, renderRectR.height );
renderer.setScissor( renderRectR.x, renderRectR.y, renderRectR.width, renderRectR.height );
renderer.render( scene, cameraR );
VREffect文件的关键点差不多是上述这些。
webvr-polyfill.js – 让现在使用WebVR成为可能
webvr-polyfill.js 根据WebVR API的草案来实现了一套polyfill。例如根据所处环境是pc还是手机来确定使用的是 CardboardVRDisplay 还是 MouseKeyboardVRDisplay ,在手机环境下的话使用 Device API 来处理手机旋转、方向等参数的获取。此外作者还顺便做了几个提示图标和画面来优化体验。在这里我们来看一下其API参数:
WebVRConfig = {
/**
* webvr-polyfill configuration
*/
// Flag to disabled the UI in VR Mode.
//是否禁用VR模式的UI。
CARDBOARD_UI_DISABLED: false, // Default: false
// Forces availability of VR mode. //是否强制使VR模式可用。
//FORCE_ENABLE_VR: true, // Default: false.
// Complementary filter coefficient. 0 for accelerometer, 1 for gyro. //互补滤波系数。加速度计在静止的时候是很准的,但运动时的角度噪声很大,陀螺仪反之。
//互补滤波器徘徊在信任陀螺仪和加速度计的边界。首先选择一个时间常数,然后用它来计算滤波器系数。 //例如陀螺仪的漂移是每秒2度,则可能需要一个少于一秒的时间常数去保证在每一个方向上的漂移不会超过2度。
//但是当时间常数越低,越多加速度计的噪声将允许通过。所以这是一个权衡的内容。 //K_FILTER: 0.98, // Default: 0.98.
// Flag to disable the instructions to rotate your device. //是否禁用旋转设备的提示(横放手机以进入全屏)。
ROTATE_INSTRUCTIONS_DISABLED: false, // Default: false
// How far into the future to predict during fast motion.
//由于有给定的方向以及陀螺仪信息,选择允许预测多长时间之内的设备方向,在设备快速移动的情况下可以让渲染比较流畅。 //PREDICTION_TIME_S: 0.040, // Default: 0.040 (in seconds).
// Flag to disable touch panner. In case you have your own touch controls、 //是否禁用提供的触摸控制,当你有自己的触摸控制方式时可以禁用
//TOUCH_PANNER_DISABLED: true, // Default: false.
// To disable keyboard and mouse controls, if you want to use your own // implementation.
//是否禁用pc下的鼠标、键盘控制。同上。
//MOUSE_KEYBOARD_CONTROLS_DISABLED: true, // Default: false.
// Enable yaw panning only, disabling roll and pitch. This can be useful for
// panoramas with nothing interesting above or below. // 仅关心左右角度变化,忽略上下和倾斜等。
// YAW_ONLY: true, // Default: false.
// Prevent the polyfill from initializing immediately. Requires the app // to call InitializeWebVRPolyfill() before it can be used. //是否阻止组件直接进行初始化构建。如果为true则需要自己调用InitializeWebVRPolyfill()。
//DEFER_INITIALIZATION: true, // Default: false.
// Enable the deprecated version of the API (navigator.getVRDevices).
//允许使用过时版本的API。 //ENABLE_DEPRECATED_API: true, // Default: false.
// Scales the recommended buffer size reported by WebVR, which can improve // performance. Making this very small can lower the effective resolution of // your scene.
//在VR显示模式下对WebVR推荐的屏幕比例进行缩放。在IOS下如果不为0.5会出现显示问题,查看
//https://github.com/borismus/webvr-polyfill/pull/106 BUFFER_SCALE: 0.5, // default: 1.0
// Allow VRDisplay.submitFrame to change gl bindings, which is more // efficient if the application code will re-bind its resources on the
// next frame anyway. // Dirty bindings include: gl.FRAMEBUFFER_BINDING, gl.CURRENT_PROGRAM,
// gl.ARRAY_BUFFER_BINDING, gl.ELEMENT_ARRAY_BUFFER_BINDING, // and gl.TEXTURE_BINDING_2D for texture unit 0
// Warning: enabling this might lead to rendering issues. //允许 VRDisplay.submitFrame使用脏矩形渲染。但是开启此特性可能会出现渲染问题。 //DIRTY_SUBMIT_FRAME_BINDINGS: true // default: false
};
其config主要是对一些用户可选项进行设定。在文件内部,更多的是对 Device API 的应用等等。
现在就开始编写WebVR应用吧!
在示例的最后是一个显示简单的旋转立方体的demo。此处可以帮助我们学习怎么创建一个WebVR应用。
首先是建立好scene、renderer、camera的三要素:
// Setup three.js WebGL renderer. Note: Antialiasing is a big performance hit.
// Only enable it if you actually need to.var renderer = new THREE.WebGLRenderer({antialias: true});
renderer.setPixelRatio(window.devicePixelRatio);
// Append the canvas element created by the renderer to document body element.document.body.appendChild(renderer.domElement);
// Create a three.js scene.
var scene = new THREE.Scene();
// Create a three.js camera.
var camera = new THREE.PerspectiveCamera(75, window.innerWidth / window.innerHeight, 0.1, 10000);
对上面解析过的controls、effect进行调用:
// Apply VR headset positional data to camera.
var controls = new THREE.VRControls(camera);
//站立姿态
controls.standing = true;
// Apply VR stereo rendering to renderer.var effect = new THREE.VREffect(renderer);
effect.setSize(window.innerWidth, window.innerHeight);
// Create a VR manager helper to enter and exit VR mode.//按钮和全屏模式管理
var params = {
hideButton: false, // Default: false. isUndistorted: false // Default: false.
};
var manager = new WebVRManager(renderer, effect, params);
在场景中,添加一个网格显示的空间,在空间内加入一个小立方体:
// Add a repeating grid as a skybox.
var boxSize = 5;
var loader = new THREE.TextureLoader();
loader.load(img/box.png, onTextureLoaded);
function onTextureLoaded(texture) {
texture.wrapS = THREE.RepeatWrapping;
texture.wrapT = THREE.RepeatWrapping;
texture.repeat.set(boxSize, boxSize);
var geometry = new THREE.BoxGeometry(boxSize, boxSize, boxSize);
var material = new THREE.MeshBasicMaterial({
map: texture,
color: 0x01BE00,
side: THREE.BackSide
});
// Align the skybox to the floor (which is at y=0).
skybox = new THREE.Mesh(geometry, material);
skybox.position.y = boxSize/2;
scene.add(skybox);
// For high end VR devices like Vive and Oculus, take into account the stage // parameters provided.
//在高端的设备上,要考虑到设备提供的场景信息的更新。 setupStage();
}
// Create 3D objects.
var geometry = new THREE.BoxGeometry(0.5, 0.5, 0.5);
var material = new THREE.MeshNormalMaterial();
var cube = new THREE.Mesh(geometry, material);
// Position cube mesh to be right in front of you.cube.position.set(0, controls.userHeight, –1);
scene.add(cube);
最后便是设置requestAnimationFrame的更新。在animate的函数中,不但要考虑立方体的旋转问题,更重要的是要不断地获取HMD返回的信息以及对camera进行更新。
// Request animation frame loop functionvar lastRender = 0;
function animate(timestamp) {
var delta = Math.min(timestamp – lastRender, 500);
lastRender = timestamp;
//立方体的旋转
cube.rotation.y += delta * 0.0006;
// Update VR headset position and apply to camera. //更新获取HMD的信息
controls.update();
// Render the scene through the manager.
//进行camera更新和场景绘制
manager.render(scene, camera, timestamp);
requestAnimationFrame(animate);
}
总结
以上便是此示例的各个文件的解析。我相信VR的形式除了在游戏上的应用的前景,在其他方面也有其值得探索的可行性。所以让我们一起来开始WebVR之旅吧!
btw我是流浪在外的大学生身上没有钱了想求3000刀回家我不知道什么是HoloLens也不知道什么是PSVR
参考内容
webvr.info
WebVR_API
http://threejs.org/docs/
https://github.com/borismus/webvr-polyfill
https://github.com/borismus/webvr-boilerplate
https://w3c.github.io/webvr/
Eye FOV
http://blog.csdn.net/popy007/article/category/640562
http://blog.csdn.net/iispring/article/details/27970937
http://www.idom.me/articles/841.html


暂无评论内容